
Get Ready to Snip, Stick, and Spark Creativity!
Grab your scissors, glue sticks, and a splash of imagination—it’s time to dive into 31 fun-filled arts and crafts activities! Whether it’s pouring rain or shining bright outside, these creative projects are perfect for every kind of day. Expect big smiles, bold ideas, and lots of hands-on fun.
Crafting isn’t just a way to pass the time—it helps kids develop essential skills like patience, problem-solving, and hand-eye coordination. With your guidance, little artists can enjoy easy, exciting art projects that blend play with learning. Best of all, you’ll be making memories together through laughter, color, and creativity.
We’ve rounded up some of the most delightful DIY crafts to inspire imagination and keep busy hands happily engaged. So gather your supplies—it’s time for an adventure in art!
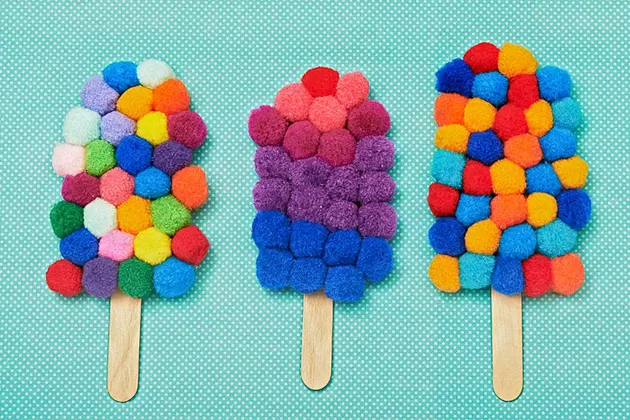
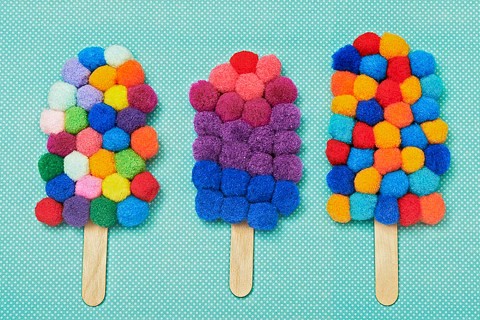
1. Pompom Ice Pops
Use colorful pompoms, craft sticks, and glue to create pretend ice pops—no sticky mess required! Kids can invent their own “flavors” while fine-tuning their motor skills.
What You’ll Need
Cardstock
Craft sticks
Pom-poms
Double-sided tape
What to Do
- Help your child cut an ice-pop shape out of cardstock.
- Tape the cardstock to a craft stick. Add tape.
- Press pom-poms onto the tape.
2. Homemade Clay
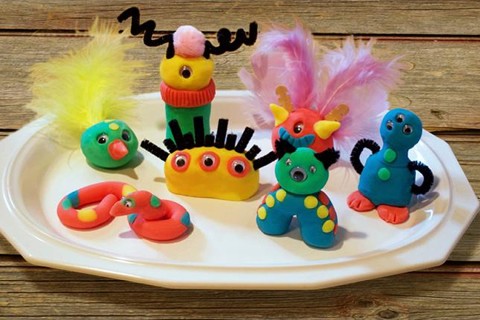
Mix baking soda, cornstarch, and water to whip up your own safe, moldable clay. Add food coloring and bake creations for a keepsake they’ll treasure.
Whip up a batch of soft, moldable homemade clay with just four pantry staples: baking soda, cornstarch, water, and a splash of food coloring. Want to take it up a notch? Add googly eyes, feathers, chenille sticks, craft sticks, or pompoms for extra fun! This easy DIY activity is perfect for sparking your child’s creativity.
What You’ll Need:
- 2 cups baking soda
- 1 cup cornstarch
- 1¼ cups water
- Food coloring
- Optional: googly eyes, feathers, chenille sticks, craft sticks, pompoms
Instructions:
- In a medium-sized pot, combine the baking soda, cornstarch, and water.
- Cook over medium heat, stirring constantly, until the mixture thickens and forms a texture similar to mashed potatoes.
- Remove from heat and allow the clay to cool.
- Once cooled, divide the clay into four portions.
- Add a few drops of food coloring to each piece and knead until the color is evenly blended and the texture is smooth.
- Shape your clay into anything you like—creatures, shapes, ornaments, and more!
- Decorate with your optional craft materials to bring your creations to life.
- Place finished pieces in a sunny spot and let them air dry.
Tip: Store unused clay in an airtight container to keep it soft for future fun!
3. Dinosaur Feet
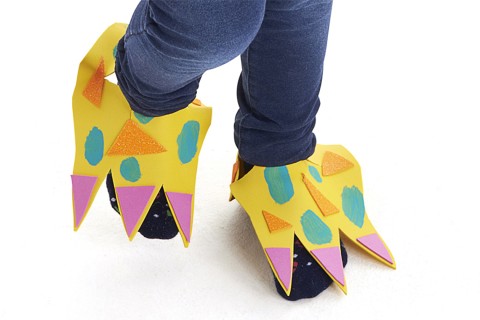
Stomp into fun with three-toed dino feet made from craft foam! Great for pretend play, dress-up, or themed parties.
Stomp Like a Dino!
Let your child’s imagination roar to life with this fun pretend-play craft! Whether they’re roaming the backyard or tiptoeing through the kitchen, these three-toed dinosaur feet are the perfect mix of creative crafting and prehistoric pretend-play. This project is sure to become a favorite that your family returns to again and again!
What You’ll Need:
- Pencil
- Scissors (you’ll need them twice!)
- Paintbrush
- Large sheets of craft foam
- Small scraps of craft foam
- Paint (any color your little dino loves)
- Craft glue
How to Make It:
- Draw the Dino Feet
Use a pencil to sketch two large dinosaur feet on the craft foam—don’t forget, dinos had three toes! Near the heel of each foot, draw a 5 cm “X” for your child’s foot to fit through. - Cut & Paint
Cut out the feet and the heel Xs. Then let your child paint their dino feet in whatever colors they like—maybe even dino spots! Let the paint dry completely. - Add Toenails
Cut small triangles or ovals from the smaller pieces of foam and glue them on as dinosaur toenails. Let them dry well before use. - Stomp & Roar!
Once everything’s dry, help your child slide their feet through the X-shaped openings. Adjust the foam around their ankles and let the dino stomping begin!
Extend the Fun:
For younger kids:
Did you know birds are today’s dinosaurs? Take a birdwatching walk and look for bird feet. Birds evolved a fourth toe that helps them grip branches—unlike their dino ancestors! Can your child spot any similarities between the birds they see and the dinos they’re pretending to be?
For older kids:
The largest dinosaur footprint ever found was about 1.75 meters long! Grab some chalk and measure it out on your driveway or sidewalk. Draw the footprint and outline it with pebbles or twigs. Add a few more to imagine just how gigantic these creatures once were!
4. Flower Pens
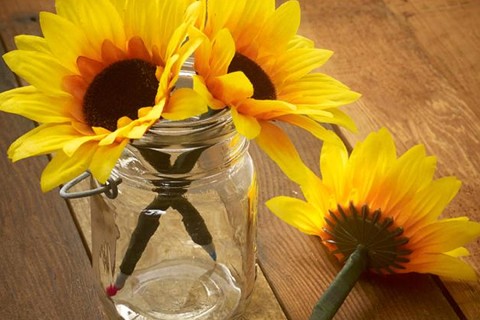
Turn everyday pens into blooming flowers using floral tape and plastic blooms. This cheerful craft brings nature indoors and adds a fun twist to writing time.
Create a Beautiful Flower Pen Bouquet!
Turn an ordinary pen into a delightful bouquet of blooms! Before you begin crafting, ask your child to think about who they’d like to give this thoughtful gift to. Make it extra meaningful by choosing flowers in that person’s favorite color—or even using their favorite flower type. And don’t forget to make a special one just for yourselves too!
What You’ll Need:
- Several small silk or plastic flowers (or one large one), with stems
- A ballpoint pen
- Floral tape
How to Make It:
- Choose Your Flowers
Pick a few small flowers and arrange them in a little bunch, or use one big flower for a bold look. - Position the Flowers
Hold the flower stems alongside the top of the pen where you want the bouquet to sit. - Wrap with Floral Tape
Starting near the flower heads, wrap the floral tape tightly around both the stems and the pen. Keep wrapping all the way to the bottom of the pen, and then back up again to secure everything in place. - Leave Space for the Cap
Be sure to leave the pen tip uncovered so it still writes—and make room for the cap if your pen has one!
Extend the Fun:
For younger kids:
Explore the difference between real and artificial flowers. What might happen if you used real flowers instead? Could you still write with the pen? Can flowers be used to draw or write? What other tools do we use for writing?
For older kids:
Turn this into a mini experiment! Write something before decorating the pen, and then again afterward. How does it feel in your hand now? Do you grip it differently? What would happen if the flowers were especially long or large? Or if you placed them in the middle of the pen instead of the top?
5. Ooey Gluey Suncatchers
With glue and food coloring, kids can create window art that shines. This low-mess craft teaches patience and color blending.
Brighten up any room with this simple and fun suncatcher craft using just a few items you likely have at home. Perfect for kids of all ages!
What You’ll Need:
- White school glue
- Clear acrylic sheet (like the kind from a photo frame) or thick cardstock
- Food coloring
- Paintbrush
- Picture frame
Instructions:
- Protect Your Workspace
Things might get a little messy—so cover your table with newspaper or a plastic cloth before you begin! - Glue It Up
Use the paintbrush to spread a generous layer of white school glue over your clear acrylic sheet or cardstock. - Add Color
While the glue is still wet, add drops of food coloring. Get creative—try mixing colors or making patterns! - Paint and Swirl
Use the paintbrush to gently swirl the colors across the glue. Watch them blend into magical, rainbow-like designs! - Let It Dry
Set your artwork aside and let it dry completely. This could take a few hours depending on how thick the glue is. - Frame It
Once dry, place your suncatcher into a picture frame for a polished look. - Display Your Art
Hang your framed masterpiece in a sunny window and enjoy the vibrant colors as the sunlight shines through!
Extend the Fun:
Make It a Social Craft!
Invite a friend or family member to join a video call while crafting. Share your designs with each other, swap finished art, or hang them in your windows as a colorful reminder of your friendship.
